Reading Notes #225

Postman Cloud


Programming


Databases


Reading Notes #224

Cloud


Programming


Miscellaneous


Reading Notes #223

P1020050Cloud


Databases


Programming


Miscellaneous


6 ways to go from Markdown to Azure Web App

Everything started when I wanted to share a blog post in progress to someone for review. I didn't want to create a copy, and I was looking for an extremely simple way to share; like an url. This blog post is about all my journey to find that method and all the great possibilities available. I was really happy to that Azure Web App.
I'm writing in Markdown, it's a syntax I really like because it's simple no special application is required to use it. To know more about it see my previous post: Why I switch to Markdown, First VSCode Tasks in less than 5 minutes and Meet my new best friend: Visual Studio Code. The more I use it, the more I like it. I started using it not only not only for blogging, but also for all kinds of notes.

DropBox

One very good thing about Markdown is the fact that is compatible with all platforms. Because of that, I keep my texts in Dropbox. Why not Google Drive or OneDrive? Because Dropbox automatically generates the HTML version so my reviewer could read it in a beautiful format. The file is share-able very easily and if authenticated my reviewer could write comment.
dropboxpostsharing
In the PRO version, of DropBox, you can give access only to specific user. That would be very nice for sharing files inside a business or more sensible information.
Unfortunately for me, I don't want to force my reviewer to register. Another interesting fact is that relative paths for images aren't supported. So all images/ charts need also to be share individually before added in the text.

Repositories: GitHub, Bitbucket, etc.

By default, most repositories convert markdown file to HTML so very easy to read. It's also a very good way to have a saved copy. But then you need to have a public repository or give access to people...
Only using repository was not good enough in my case because I don't wish to share unfinished work with everyone.

Jekyll


Option 1 - Jekyll

Jekyll is a static website generator written in Ruby. It's really well integrated to Github, and you can even host your blog in a Github repository. However, since I would prefer to keep my in progress work more private, I decided to go with Bitbucket. Bitbucket is a great repository that supports Git and Mercurial system and allowed private repositories.
We could have Jekyll in a Git repository host on Bitbucket that would be hook-up to an Azure Web App with a continuous deployment.
Here the steps:
  1. First create a private repository from Bitbucket.
  2. Clone that fresh repository on your local machine.
  3. Now it's time to create your Jekyll site.
    • If you don't have Ruby or Jekyll already installed on your machine now it's time. It's very easy just follow the instruction on the official website.
    • To create a new site, open a command prompt and type the command: jekyll new NameOfMySite then cd ./NameOfMySite and jekyll serve
    To see your new site you just need to browse to http:localhost:4000. Add your Markdown files to the folder _posts and be sure they respect the naming convention YYYY-MM-DD-Title.md
  4. Now it's time to add all the files to our Git repository with the command git add -A, and before pushing let create a new Azure Web App.
  5. Go to http://portal.azure.com a create a new Azure Web App.
    CreateAzureWebApp
    • From the top left click the "+ New" button.
    • Select Web+ Mobile, then click on Web App
    • Fill-up the name, subscription plan and click the create button.
  6. After few second, the Web App will be ready. It's time to add a continuous deployment to it.
    AddContinuous
    Note: that right now the deployment settings are FTP.
    • In the Web App blade, if not already go in the Setting section.
    • Scroll done the Settings to Continuous deployment and click on it.
    • Now choose your source control, in this case Bitbucket.
  7. It's now time to publish our site to our Remote repository with git push.
  8. In the Azure portal, you will see the deployment progress and history.
    DeploymentHistory
The combination Jekyll / Bitbucket / Azure Web App work great, but we need to generate the code locally and checked-in both source and generated content in the repository. Furthermore, since we need to generate the code, Ruby and Jekyll need to be installed on every machine we will be using.

Option 2 - Jekyll Extension to Azure Web App

I found a really great Azure Web App Extension Jekyll Extenstion on GitHub. That will simplify a lot the process thanks to Cory's works. To use it simple follow the four steps explain on the Github page:

  1. Create an Azure Web App 
  2. Set an App Setting for SCM_COMMAND_IDLE_TIMEOUT to 600. From the Web App blade click on Settings and select Application settings.  Add the new line, and click the save button.
     SCM_AppSetting
  3. Install the Jekyll Site Extension
    • Always From the Web App blade click on Tools, then select Extension
    • Click Add button
    • Found and select Jekyll Extension AddJekyllExtension
  4. Now we need to hook up your Git repository or Push a local (in Azure) Git repository with your Jekyll site.
I really liked this solution. It's very simple to install. Because it used a repository, I can keep a historic of all my texts. Moreover, only the texts and images are in the repository, and since the site is generated in the cloud, no need to install anything on other machines.
WriteFromVSCode
Directly from Visual Studio Code, I can write my article, and when I'm read I just need to do a push (still inside VSCode). The site will automatically be built and deployed in my Azure Web App.

Santra.Snow

NancylogoWhile doing my research, I found Sandra.Snow another static site generator inspired from Jekyll but in .Net using Nancy library.
To use it, a little bit of work is required. The easiest way is to fork the Github project and compile the solution to get dlls and exes.
  • Create a new folder for your site [MySnowSite].
  • In MySnowSite folder, create another folder Sandra.Snow.Processor and copy/paste: Nancy.dll, Nancy.Testing.dll, Nancy.ViewEngines.Razor.dll and Snow.exe generated previously.
  • You can now copy the Sandra.Snow/SnowSite/Snow folder into MySnowSite folder.
  • Add deployment and deploy.cmd files from Sandra.Snow/SnowSite into MySnowSite folder.
SandraSnowFolder
Few changes were required in deploy.cmd (line: 29, 31, 56, 57)
@echo off

:: ----------------------
:: KUDU Deployment Script
:: ----------------------

:: Setup
:: -----

setlocal enabledelayedexpansion

SET ARTIFACTS=%~dp0%artifacts

IF NOT DEFINED DEPLOYMENT_SOURCE (
  SET DEPLOYMENT_SOURCE=%~dp0%.
)

IF NOT DEFINED DEPLOYMENT_TARGET (
  SET DEPLOYMENT_TARGET=%ARTIFACTS%\wwwroot
)

::::::::::::::::::::::::::::::::::::::::::::::::::::::::::::::::::::::::::::::::::::::::::::::::::::::::::::::::::::::::::::::::::
:: Deployment
:: ----------

:: 3. Build Snow Site
echo -----
echo Start - Building the Snow Site
echo Running Snow.exe config=%DEPLOYMENT_SOURCE%\Snow\
pushd %DEPLOYMENT_SOURCE%
call  %DEPLOYMENT_SOURCE%\Sandra.Snow.Processor\Snow.exe config=%DEPLOYMENT_SOURCE%\Snow\
IF !ERRORLEVEL! NEQ 0 goto error
echo Finish - Building the Snow Site
echo -----


IF NOT DEFINED NEXT_MANIFEST_PATH (
  SET NEXT_MANIFEST_PATH=%ARTIFACTS%\manifest

  IF NOT DEFINED PREVIOUS_MANIFEST_PATH (
SET PREVIOUS_MANIFEST_PATH=%ARTIFACTS%\manifest
  )
)

IF NOT DEFINED KUDU_SYNC_COMMAND (
  :: Install kudu sync
  echo Installing Kudu Sync
  call npm install kudusync -g --silent
  IF !ERRORLEVEL! NEQ 0 goto error

  :: Locally just running "kuduSync" would also work
  SET KUDU_SYNC_COMMAND=node "%appdata%\npm\node_modules\kuduSync\bin\kuduSync"
)


echo Kudu Sync from "%DEPLOYMENT_SOURCE%\Snow\Website" to "%DEPLOYMENT_TARGET%"
call %KUDU_SYNC_COMMAND% -q -f "%DEPLOYMENT_SOURCE%\Snow\Website" -t "%DEPLOYMENT_TARGET%" -n "%NEXT_MANIFEST_PATH%" -p "%PREVIOUS_MANIFEST_PATH%" -i ".git;.deployment;deploy.cmd" 2>nul
IF !ERRORLEVEL! NEQ 0 goto error

::::::::::::::::::::::::::::::::::::::::::::::::::::::::::::::::::::::::::::::::::::::::::::::::::::::::::::::::::::::::::::::::::

goto end

:error
echo An error has occured during web site deployment.
exit /b 1

:end
echo Finished successfully.
Like previously created a Azure Web App and hook up a Git repository or push to an Azure one. You can find a lot of information on the blog of Sandra.Snow creator Phillip Haydon.

Bonus

For both Jekyll (option 2) and Sandra.Snow that used Azure Web App continuous deployment use can use Dropbox instead of Git repository. Why would you use Dropbox? Well, since Dropbox is available on any kind of platform, you would be able to write from your iPad or android tablet, or anything! To learn more about how to do it, see one of my previous post: Setup an automatic deployment on Azure with Dropbox in 5 minutes.
Just for the fun, I created one theme for Sandra.Snow that I put on GitHub: Sandra.Snow.NotesTheme, feel free to use it.

Enjoy!

~Frank Boucher

Reading Notes #222

hourglassSuggestion of the week


Cloud


Data


Reading Notes #221

logo_JavaScriptSuggestion of the week

  • Why You Should Learn JavaScript in 2016 (Ken Powers) - I eared a lot of people complaining about Javascript, this excellent post explains why you undeniably, we should all know it, an if it's not the case why 2016 is a great time to learn it.

Cloud


Programming


Data

  • Power BI Service February Update (Amanda Cofsky) - Fantastic! This update will give us the possibility to share outside ou organization... And many other things.

Miscellaneous


~Frank


Reading Notes #220

Logic-AppSuggestion of the week


Cloud


Programming


Data

Book

  • Software Development Book Giveaway! - Cool! A great opportunity, 3 free books are given: Building Microservices, Working Effectively with Legacy Code, and Javascript: The Good Parts.

Miscellaneous


Reading Notes #219

AzureSDK2-8-2Suggestion of the week


Cloud


Programming


Books


Reading Notes #218

GuyAndErikSuggestion of the week


Cloud


Programming


Data


Reading Notes #217

yoman_asciiSuggestion of the week


Cloud


Programming


Miscellaneous


Reading Notes #216

2016-01-10_2136Cloud


Programming


Data


Podcast

  • .NET Rocks! vNext - Really interesting podcast episode. I think it's the clearer and more comprehensible explanation of Git I have ever eared.

Miscellaneous


Reading Notes #215

Reading on the roadCloud


Programming


Data


Miscellaneous


Reading Notes #214

Suggestion of the week

  • Express - This is the perfect post to get started with node.js with Azure. This post starts with you step by step from a vanilla computer running OS X or Linux to your first App.

Cloud


Programming


Data


Miscellaneous


Reading Notes #213

Cloud


Programming


Databases


Reading Notes #212

2015-12-07_0722Cloud


Programming


Simple as Azure Marketplace

It happens to all of us, we need to have something done, and we needed for yesterday. In these times, we struggle, we don’t know where to start or worse, what to do. My grand-mother use to say: “When I don’t know what to cook, I always start by a sauté of onions. It’s smell so good it helps me to get started." In this post, I will show you my “sauté of onions” tips to get an environment up and running quickly.

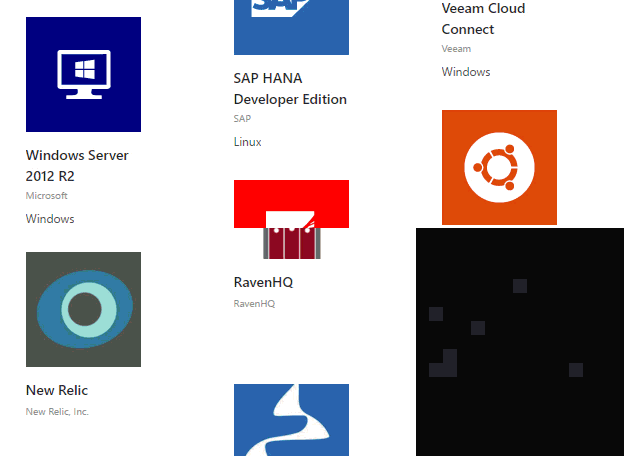
Everybody knows that when you are looking for something for your mobile device you just need to go the  “App Store”. But did you know Microsoft Azure has his own store? It’s called the Azure Marketplace .

Your online store for thousands of certified, open source, and
community software applications, developer services, and
data—pre-configured for Microsoft Azure. Download, deploy, and get
more done.
It's not containing two or three hundred of items but more than three thousand five hundred. Yes, that right, more than 3500! Whether you need a virtual machine, a web application, or a web API, great chance it will be available in the Marketplace. And it’s still continued to grow day after day.

It’s easy to think that we can “pop” and WordPress website in less then 5 minutes. It’s also true that creating a brand-new virtual machine, with a vanilla Windows server or Linux, is only few clicks. Moreover, many much more complex solutions could be created in the same way.

1, 2, 3, CommVault Simpana

Recently, I needed to find a fast and easy way to create a solution to provide data management that is easily accessible regardless of location. A quick search in the Azure Marketplace shows me all the different options I had. I know that  Simpana is a great product so let’s use this one.

AzureMarketSearch

When an item is selected from the search list in the Azure Marketplace, the detail view is presented. This page contains all the information: prices, sizes, documentation and references.
Let’s start! Press the big green “Create Virtual Machine” button on the top of the screen. That will open the Microsoft Azure Portal with the blade ready to create your Simpana. An active Azure subscription is required, if you don’t have one get started it one-month Free here. At the bottom of the page, you will need to select the deployment mode. I strongly suggested to select the Resource Manager, because it provides more flexibility to manage the resource once you have it created. When you are ready click the Create button.

Step_1-3_create

The first and second step, ask about the basics information: name, subscription, resource group, location and the size. The third step should be already populated base on the information you entered, but feel free to change it if you wish. The two next steps are just to be sure you understand the billing, and a summarize de new deployment.

commvault-_RG

When all the steps are completed, the portal will start the deployment of our solution. After few minutes, it should be done, and if you open the resource group, we can see all the deployed and configured items.

Simpana_and_Console_Applications

By selecting the Virtual Machine in the resource group, it will provide a Connect option. Click on it  to download a Remote Desktop connection. Once connected, click the Start Menu, and you will find Simpana ready to serve.

The Azure Marketplace is a really important and powerful tool. It will help to create simple or complex solution easily and in only few minutes. A good way to improve our productivity.
References

Reading Notes #211

switch-949109_640Cloud


Programming


Miscellaneous


PowerBI and Microsoft Azure Consumption

Recently, I needed to check and compare Azure consumption for a client. What a repetitive task: download the csv files from the Azure billing portal, open it in Excel to clean/merge/customize it… Would it be great if it could be easily done? Well, it is! Power BI is the perfect tool to do that (and a lot more).  In this post, I will explain how I created my Power Query and solved different problem I encountered in my journey.

The Goal


I want PowerBI to read (dynamically) all csv files in a folder and updates all my charts and graph, so I can share them easily why my clients.

The Tools


To create Power Queries, you can use the new Power BI Desktop available online for free or Excel. With Excel 2016, the Power query editor tools is included, for the previous version you need to install the Microsoft Power Query for Excel add-in. In both cases, many tutorials explain how to get started with these tools (see the references at the end of this post).

The Problem


Creating our query should be pretty straight forward, since we can create a Power Query by selecting a folder as a source.
Import_auto_csv
The problem is that our file contains three types of records: Provisioning Status, Statement, and Daily Usage. These “tables” are very different and don’t have the same number of columns. This is why when we try to merge them; we got some Error.

Expend_all_fail
Error_Auto_import

The Solution


The way to solve this problem is to create a function that will parse one file to extract one recordset, and call that function for all the file in the folder.

Note:
The simplest way to get started is to work with one file, then convert it to a function. The way to that is to replace the path of the csv file by a variable that will be passed as a parameter: (filePath) =>.
To keep the code as simple as possible, I kept the function and the looping query separated, but they can be merged in only query.

Extract “Daily Usage”


Here are the queries to extract the Daily Usage (third recordSet) from the csv file and some code description.
 // -- fcnCleanOneCSV_v2 ----------------------------------------

(filePath) =>
let
   fnRawFileContents = (fullpath as text) as table =>
let
   Value = Table.FromList(Lines.FromBinary(File.Contents(fullpath)),Splitter.SplitByNothing())
in Value,

   Source = fnRawFileContents(filePath),
   #"Daily Usage Row" = Table.SelectRows(Source, each Text.Contains([Column1], "Daily Usage")),
   #"DailyPosition" = Table.PositionOf(Source, #"Daily Usage Row" {0}),
   #"TopRemoved" = Table.Skip(Source, (DailyPosition + 1)),
   #"Result" = Table.PromoteHeaders(TopRemoved)
in 
   Result
The first part is to load the content of the file as a one column table. Then DailyPosition is used to store the position where Daily Usage data starts. This value is used in Table.Skip(Source, (DailyPosition + 1)) to keep only the rows after, since Daily usage is the last recordSet it works perfectly.
 //== Process Folder CSV_v2 for Daily Usage==============================

let
   Source = Folder.Files("C:\Azure_Consumption_demo\CSV_v2\"),
   MergedColumns = Table.CombineColumns(Source,{"Folder Path", "Name"},Combiner.CombineTextByDelimiter("", QuoteStyle.None),"Merged"),
   RemovedOtherColumns = Table.SelectColumns(MergedColumns,{"Merged"}),
   #"Results" = Table.AddColumn(RemovedOtherColumns , "GetCsvs", each fcnCleanOneCSV_v2([Merged])),
   #"Removed Columns" = Table.RemoveColumns(Results,{"Merged"}),
   #"Expanded GetCsvs" = Table.ExpandTableColumn(#"Removed Columns", "GetCsvs", {"Usage Date,Meter Category,Meter Id,Meter Sub-category,Meter Name,Meter Region,Unit,Consumed Quantity,Resource Location,Consumed Service,Resource Group,Instance Id,Tags,Additional Info,Service Info 1,Service Info 2"}, {"Usage Date,Meter Category,Meter Id,Meter Sub-category,Meter Name,Meter Region,Unit,Consumed Quantity,Resource Location,Consumed Service,Resource Group,Instance Id,Tags,Additional Info,Service Info 1,Service Info 2"}),


   #"Demoted Headers" = Table.DemoteHeaders(#"Expanded GetCsvs"),
   #"Split Column by Delimiter" = Table.SplitColumn(#"Demoted Headers","Column1",Splitter.SplitTextByDelimiter(","),{"Column1.1", "Column1.2", "Column1.3", "Column1.4", "Column1.5", "Column1.6", "Column1.7", "Column1.8", "Column1.9", "Column1.10", "Column1.11", "Column1.12", "Column1.13", "Column1.14", "Column1.15", "Column1.16"}),
   #"Changed Type" = Table.TransformColumnTypes(#"Split Column by Delimiter",{{"Column1.1", type text}, {"Column1.2", type text}, {"Column1.3", type text}, {"Column1.4", type text}, {"Column1.5", type text}, {"Column1.6", type text}, {"Column1.7", type text}, {"Column1.8", type text}, {"Column1.9", type text}, {"Column1.10", type text}, {"Column1.11", type text}, {"Column1.12", type text}, {"Column1.13", type text}, {"Column1.14", type text}, {"Column1.15", type text}, {"Column1.16", type text}}),
   #"Promoted Headers" = Table.PromoteHeaders(#"Changed Type"),
   #"Changed Type1" = Table.TransformColumnTypes(#"Promoted Headers",{{"Usage Date", type date}, {"Meter Region", type text}}),
   #"Replaced Value" = Table.ReplaceValue(#"Changed Type1","""","",Replacer.ReplaceText,{"Meter Category", "Meter Id", "Meter Sub-category", "Meter Name", "Meter Region", "Unit", "Resource Location", "Consumed Service", "Instance Id", "Tags", "Additional Info", "Service Info 1", "Service Info 2"}),
   #"Changed Type2" = Table.TransformColumnTypes(#"Replaced Value",{{"Consumed Quantity", type number}})
in
  #"Changed Type2"
From row 1 to 6, we get all the file in the folder then combine columns to get a full path for each file. We then pass that to our function previously defined. With the command Table.SplitColumn, on line 11, we re-built the result as a table with multiple columns.
The rest of the query is to clean-up the result by changing the column’s type or removing undesired character.


Extract “Statement”


To get the Statement recordSet, it’s the same thing except that we will Table.Range, since the rows that we are looking for are between Provisioning Status and Daily Usage.
//== fcnGetStatement ========================================== 

(filePath) =>
let
   fnRawFileContents = (fullpath as text) as table =>
let
   Value = Table.FromList(Lines.FromBinary(File.Contents(fullpath)),Splitter.SplitByNothing())
in Value,

    Source = fnRawFileContents(filePath),
    #"Daily Usage Row" = Table.SelectRows(Source, each Text.Contains([Column1], "Daily Usage")),
    #"DailyPosition" = Table.PositionOf(Source, #"Daily Usage Row" {0}),
    #"Statement Row" = Table.SelectRows(Source, each Text.Contains([Column1], "Statement")),
    #"StatementPosition" = Table.PositionOf(Source, #"Statement Row" {0}),
    #"SelectedRows" = Table.Range(Source,(StatementPosition+1),(DailyPosition - StatementPosition )-2),
    #"Result" = Table.PromoteHeaders(SelectedRows)
in
    Result
And once again we loop through every file and do some clean-up.
//== Query Statements ========================================

let
    Source = Folder.Files("C:\Azure_Consumption_demo\CSV_v2\"),
    MergedColumns = Table.CombineColumns(Source,{"Folder Path", "Name"},Combiner.CombineTextByDelimiter("", QuoteStyle.None),"Merged"),
    RemovedOtherColumns = Table.SelectColumns(MergedColumns,{"Merged"}),
    #"Results" = Table.AddColumn(RemovedOtherColumns , "GetCsvs", each fcnGetStatement([Merged])),
    #"Removed Columns" = Table.RemoveColumns(Results,{"Merged"}),
    #"Expanded GetCsvs" = Table.ExpandTableColumn(#"Removed Columns", "GetCsvs", {"Billing Period,Meter Category,Meter Sub-category,Meter Name,Meter Region,SKU,Unit,Consumed Quantity,Included Quantity,Within Commitment,Overage Quantity,Currency,Overage,Commitment Rate,Rate,Value"}, {"Billing Period,Meter Category,Meter Sub-category,Meter Name,Meter Region,SKU,Unit,Consumed Quantity,Included Quantity,Within Commitment,Overage Quantity,Currency,Overage,Commitment Rate,Rate,Value"}),


    #"Demoted Headers" = Table.DemoteHeaders(#"Expanded GetCsvs"),
    #"Split Column by Delimiter" = Table.SplitColumn(#"Demoted Headers","Column1",Splitter.SplitTextByDelimiter(",", QuoteStyle.Csv),{"Column1.1", "Column1.2", "Column1.3", "Column1.4", "Column1.5", "Column1.6", "Column1.7", "Column1.8", "Column1.9", "Column1.10", "Column1.11", "Column1.12", "Column1.13", "Column1.14", "Column1.15", "Column1.16"}),
    #"Promoted Headers" = Table.PromoteHeaders(#"Split Column by Delimiter"),
    #"Replaced Value" = Table.ReplaceValue(#"Promoted Headers","""","",Replacer.ReplaceText,{"Meter Category", "Meter Sub-category", "Meter Name", "Meter Region", "SKU", "Unit"})
in
    #"Replaced Value"

Once all that is done… Now the fun can begin!


References


Reading Notes #210

2015-11-22_2132Suggestion of the week


Cloud


Databases